

How to Tell If Your Attic Insulation Was Installed Correctly
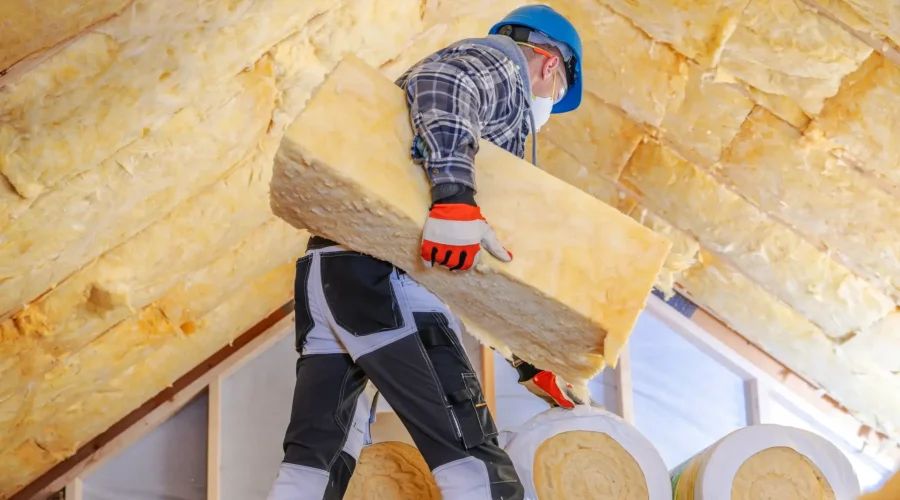
Having attic insulation doesn’t automatically mean your home is well-insulated. Poor installation is one of the most common reasons homeowners don’t see the energy savings or comfort improvements they expected after an insulation project — and it’s also one of the hardest problems to identify without knowing what to look for.
Whether the insulation was installed when your home was built, added during a previous renovation, or upgraded by a contractor you’re not sure about, there are clear signs that can tell you whether the job was done right. At Swiftguard Enterprises LLC, we assess attic insulation for homeowners throughout Oak Lawn, IL and the greater Chicagoland area. Here’s what a correctly installed attic insulation job looks like — and what red flags to watch for.
Before evaluating the installation itself, it helps to know what you’re measuring against. The U.S. Department of Energy recommends R-38 to R-60 for attic insulation in Illinois’s climate zone, with R-49 being a common target for most Chicagoland homes. R-value measures thermal resistance — the higher the number, the better the insulation performs.
If you can see your attic joists clearly above the insulation, the depth is almost certainly inadequate. For fiberglass batts, R-38 corresponds to roughly 12 inches of depth. For blown-in fiberglass or cellulose, the same R-value requires approximately 10–14 inches depending on the material’s density. A correctly installed attic should have insulation depth that fully covers the joists and meets the recommended R-value for your home’s size and layout.
One of the clearest signs of a poor installation is uneven coverage. Insulation that’s thick in the center of the attic and thin near the eaves, piled up in some areas and missing in others, or crammed unevenly between joists creates thermal weak points that undermine the performance of the entire system.
A correctly installed attic insulation job has consistent depth across the full floor area, including:
Walk through your attic (carefully, stepping only on joists or boards) and look for areas where depth drops off noticeably. Those gaps are where heat escapes in winter and enters in summer.
Proper attic ventilation requires clear airflow from the soffit vents at the eaves up through the attic space and out through ridge or box vents at the peak. A common installation mistake — particularly with blown-in insulation — is allowing material to drift into the eave area and block the soffit vents.
Blocked soffit vents eliminate intake airflow, which disrupts the ventilation system and leads to moisture buildup, ice dam formation, and accelerated roof deck deterioration. A correctly installed job will have rafter baffles (also called ventilation chutes) in place at each rafter bay along the eaves before insulation is installed. These baffles create a channel that keeps the vent opening clear regardless of how deep the insulation goes.
If your attic has insulation piled against the eaves with no baffles visible, the ventilation circuit is likely compromised.
The attic floor has dozens of potential air leakage points: recessed light fixtures, plumbing stacks, electrical wiring penetrations, attic hatches, and the tops of interior walls. These are called bypasses, and they’re the primary route through which conditioned air escapes from the living space into the attic.
Before insulation is installed, all significant bypasses should be air-sealed — typically with caulk, spray foam, or rigid blocking depending on the size and type of opening. Insulation alone does not stop airflow; it only slows the transfer of heat through solid material. An attic where bypasses weren’t sealed before insulation went down loses a significant portion of its thermal benefit to air leakage.
Signs that bypasses weren’t properly sealed include:
For fiberglass batt insulation specifically, the installation method matters as much as the R-value rating of the product. Batts that are compressed to fit into a space smaller than their rated thickness lose R-value proportionally — a batt rated R-19 that’s compressed to half its thickness no longer delivers R-19. Similarly, batts with gaps around the edges, cut too short, or folded to fit around obstructions create thermal bridges that reduce overall performance.
A correctly installed batt job has:
The attic access hatch is frequently the most under-insulated part of the entire attic assembly. A standard pull-down stair or hatch cover provides almost no thermal resistance on its own — and if it wasn’t addressed during an insulation project, it’s a significant weak point regardless of how well the rest of the attic was done.
A correctly addressed attic hatch has an insulated cover — either a manufactured insulated stair cover, a rigid foam panel cut to size and adhered to the hatch door, or a insulated tent or box that sits over the opening from inside the attic. The hatch should also seal tightly against its frame to prevent air infiltration around the edges.
If your attic insulation shows any of the signs above, the most useful next step is a professional assessment. A qualified contractor can measure your existing R-value, identify areas of inadequate coverage or missing air sealing, check for blocked ventilation, and give you a clear picture of what it would take to bring the installation up to standard.
In many cases, improving an existing installation is less expensive than a full replacement — adding depth to meet the recommended R-value, sealing bypasses, and installing baffles are targeted improvements that can meaningfully improve performance without starting from scratch.
At Swiftguard Enterprises LLC, we evaluate attic insulation as part of our home assessment services for homeowners throughout Oak Lawn, IL and up to 60 miles surrounding the area. We identify installation problems clearly and give you honest guidance on what needs to be addressed.
Think your attic insulation may not be doing its job? Contact Swiftguard Enterprises LLC today to schedule your inspection and get expert guidance for your Oak Lawn, IL home.

With 15 years of experience, we are committed to delivering high-quality workmanship, dependable service, and long-lasting results.
We don’t just build and repair — we protect what matters most.